“To forget how to dig the earth and to tend to the soil is to forget ourselves.”
-Mahatma Gandhi
Are you one of those precious people who still grow veggies at home? Do you also struggle with finding the right vegetable to plant? If yes, then you’re at the perfect place. Growing your own food has a charm of its own. It certainly comes with its share of troubles but the satisfaction of looking at your vegetable garden, nurtured by you, is incomparable. I’m here to help you pick the easiest and most productive veggies to grow (and also to crack a few lame jokes).
21 Best and Most Productive Vegetables to Grow at Home
1. Lettuce
Lettuce begins with lettuce (hahahahahaha). Both time and space effective, the lettuce is your calcium filled superstar. It’s an ideal pot vegetable because it requires less space and gives good yield in a short time (8 weeks). The formula for growing it well is moist soil and drainage. Master these two and you’re 70% done.
The soil you choose should be loamy- it should drain well- and it should contain compost or manure. Avoid waterlogging or over-watering at all costs because the roots of the lettuce are shallow. This is also why you should steer away from fertilizers unless they’re a must. A cool climate (no more than 23° C) is required for lettuces and spring is the ideal period of planting.
If you live in the hardiness zone in the US or any other place with a hot climate, plant during winter. A cool atmosphere prevents bolting (premature growth) in lettuces. Time to get shady. Avoid direct exposure to sunlight because lettuces are heat sensitive.
Pick the right type to plant. For instance, the Crisphead is the hardest to grow in pots whereas the Loose Leaf is the most productive. Leave enough space while planting (4 inches at least) and make sure that your pot drains well. An important reminder- while harvesting, cut the lettuce above to crown to avoid any damage to the plant. Go get rich on that Vitamin C!
2. Green onions
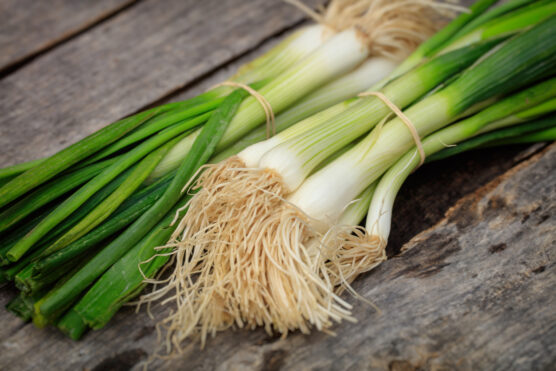
These are a triple vitamin combo- K, C, and A. Antibacterial and antiviral, green onions also aid digestion and lower blood sugar to keep diabetes at bay. They’re fairly easy to grow for a home garden and they keep giving if planted right. However, you must take care of the basics.
First comes good soil- onions need firm soils to grow. Get some good quality potting soil from a store near you or online (Amazon recommends PW All Purpose Potting Soil).
Secondly, six hours of sun are needed for onions because they crave the light. Third, come fertilizers and good drainage. Fourthly, your container should be wide to evenly space out your onions 2 inches apart.
You can get scallions (baby green onions with attached white roots) at a shop nearby, cut off their tops and replant them.
(Or if you’re feeling fancy, go with pearly onions. These will make you wait longer as they have to grow their roots. Simply replant them and wait.)
The green onion is a vegetable that keeps giving. So be a dear and maintain it well.
3. Tomatoes

Sun and water – the two golden words you need to grow the best juicy red tomatoes.
Potting tomatoes is the best because it reduces the chances of an outbreak and gives a good yield.
Now there’s something called determinate tomatoes. I know you’re visualizing a serious-looking tomato but that’s not it. Determinate means the tomatoes that stop growing after a specific point of time. They require less maintenance since they don’t grow all over the place. These are the ones you should be growing in your home garden.
When you begin planting them, leave ample space in the pot, plant them in deep and drill holes in the pot of it doesn’t have any for drainage. Choose a good potting mix which isn’t very heavy. Keep away black plastic because it absorbs heat (the bad kind of heat). Fertilizer your tomatoes and water them regularly (but remember that over-watering causes blossom end rot). You can add mulch in your pot to keep the soil moist.
The best ones for you to grow are Bushsteak, Patio Princess and Baxter’s Bush Cherry.
4. Peppers
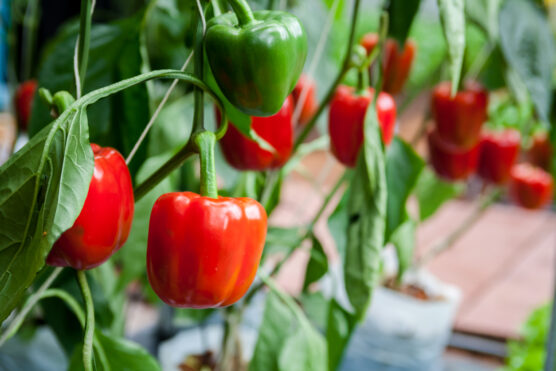
Temperature tolerant and Vitamin C rich, peppers are also space effective. They take around two months before you can harvest and eat them.
You start off by buying seeds and planting them in wide and deep containers. Avoid seeding in peak summer, peppers need a warm soil so cool temperatures to work just fine. Just ensure that the temperature doesn’t go below 15° C or above 32° C. In case of frost, cover the plant.
Keep your potting mix very loose and organic (add manure, compost, peat, etc). Now comes the most basic step- watering. Your soil shouldn’t get dry at any point so water the plant very regularly. However, watering it from the top can cause fungal infections.
Peppers require fertilizers periodically (every 13 days approximately). To avoid blossom end rot, feed the plant calcium granules. They are also prone to the awful aphids so watch out for any clusters.
Once they’re ready for harvest, add them to your meals for some heat!
5. Eggplant

One plant will give you 3-4 delicious eggplants but you’ll have to wait for 100 days. Your patience will bear fruit (pun intended) and you can harvest these beauties.
You’ll need larger containers (a 20-inch container will have 2 to 3 plants) because the roots of the eggplant take up space. If your pots don’t have drainage holes, drill some in.
It’s advisable to plant the seeds after frost.
Now coming to the soil- go with a 2:1 ratio. 2 portions of a trusted potting soil and 1 portion of sand. This will keep the soil moist but not wet. You can even add compost to the mix. Warmth and air circulation are crucial.
We have another sun lover in this plant. 8 hours of sunlight are ideal for it to thrive. After germination of the seeds, any temperature above 10° C is doable.
You may also feed you plant liquid plant food at intervals. (Follow instructions given on packaging).
Watch for signs of the black flea beetle or the cutworm- both are arch enemies of eggplants. Try and avoid using pesticides as far as possible.
6. Garlic
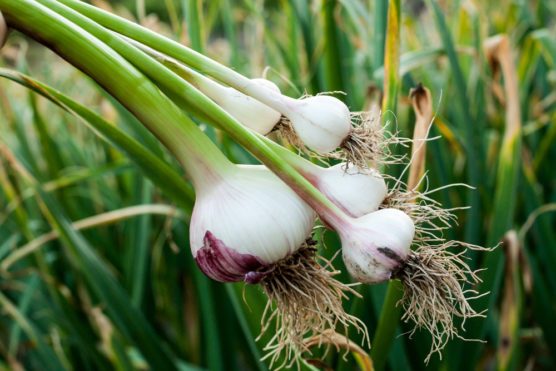
Or as I like to call it, the beginner’s beauty. Growing garlic is very simple and hassle-free. The major thing it demands is patience. You see, garlic is a little late but worth the wait. It’ll take about 8 months for your garlic to be ready.
To begin, just break off a clove from a bulb of garlic and plant it bottom down in a pot which is 8 inches deep. The pot should have drainage holes. The benefit of pot planting is that it reduces the chance of disease. If you’re planting multiple cloves, make sure there’s a distance of 4-5 inches between each clove.
If you live in a place with a moderate climate, go with soft neck garlic. If your atmosphere is chilly, the hard neck is the way to go.
The soil you choose needs to be loamy. You can create your own mix by taking 3 portions of soil and one of sand. Plant the cloves around Halloween.
Garlic also needs 8 hours of sunlight. Once it starts flowering, cut the flowers to promote bulb growth. Ideally, you should harvest it once the leaves turn yellow. While harvesting doesn’t pull the garlic up, gently dig in and remove.
Worry not about the waiting needed for garlic. Once ready, it is a proven mood lifter. (*Winks*).
7. Carrots
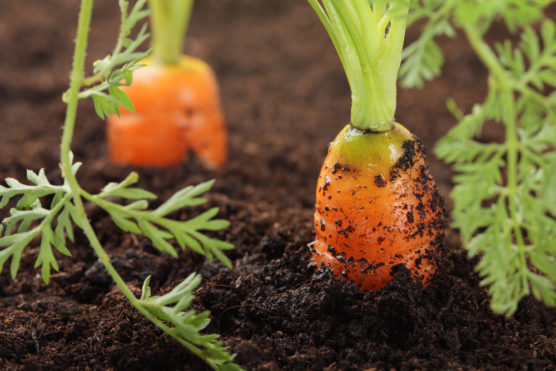
This won’t make you wait too much. Carrots take 3 months to grow and the process is fairly basic.
Carrots are a root crop and hence, the containers required are wide and short. You should plant your seeds around spring because cool weather is desirable. 10° C is a reasonable temperature to work with.
Sandy or loamy soil is what you need for carrots. Spread out the soil in the pot, sprinkle the seeds (2-inch spacing) and then again put some soil on top. Water the plant. Take care of proper drainage.
I would recommend you avoid using fertilizers completely but if you want to, use them once a week and avoid nitrogen in them.
Beware of the carrot nest fly, she’s always looking to lay eggs.
Go for a shorter variety of carrots for a home garden- Romeo or Parisienne. How romantic.
8. Beans
They keep giving for a couple of months and the beautiful flowers adorning them are edible. Fiber-rich and heart-healthy, pole beans are next in the lineup.
A warm-season crop, beans are planted in spring, after all, traces of frost are gone. A container that is 12 inches wide can accommodate approximately 8 plants. The spacing should be 3 inches. You can fix poles or sticks in the container to support the beans.
Don’t forget about the drainage in the container. Bean there, done that.
The soil should contain manure before you plant the seeds. Once your plants shoot up after a week and a half, spread mulch over the base. You.can make your own soil using compost, potting mix and vermiculite.
Pole beans need plenty of water (an inch every week). But also make sure that the soil isn’t soggy.
Use a diluted liquid fertilizer once in 40 days. If you notice any pests, don’t use chemicals. Neem oil is a great remedy to fight off insects.
It’ll take 45-60 days till your beans are all set to get harvested. Feel the pods before you break them off, are they medium-sized and firm? If yes, continue. Be gentle while plucking.
For pole beans, the Kentucky Wonder Pole Bean Seeds (30+ seeds for $2.69) are a great option.
9. Cucumbers
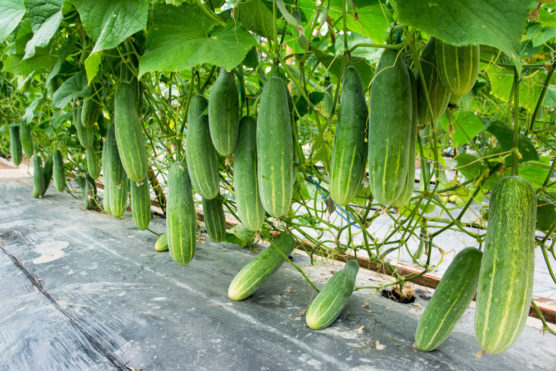
Here’s why we love cucumbers. They keep us hydrated and they’re space-friendly which is perfect for a home garden.
To grow cucumbers, you need bigger containers for widespread roots. Plant cucumbers a week or two after the frost. 21°-35° C is the temperature range to follow. Cucumbers need warmth and moisture. 1-2 inches of water weekly is enough. They also need 8 hours of sunlight to grow.
You should add a trellis to your container because cucumbers grow vertically. Ensure that your trellis is sturdy and doesn’t sway by strong winds.
Good air circulation is important to avoid the white powdery mildew. Another problem is cucumber beetles and squash bugs but they can be tackled with neem oil.
Diva cucumbers are a variety of bush cucumbers and they’re great to start with.
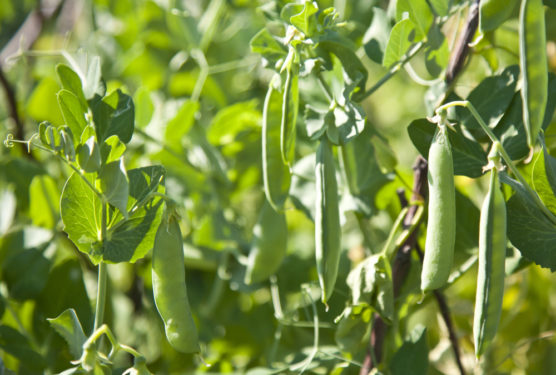
10. Peas
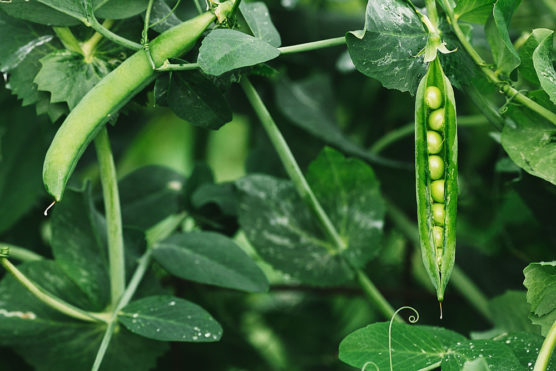
Quick and tasty results are here! Peas take 10-30 days before they’re ready for harvesting. They are thirsty plants but also require fertilization.
Garden peas or shelling peas are a very good option as they give a good yield and are resistant to diseases.
A warm crop, 16° C is the correct temperature for it to grow (spring and early summer). Planting peas is fairly simple. Take a wide pot (courtesy shallow roots) and drill some drainage holes if there aren’t any. Fill the pot with soil, leaving the top one inch empty. No garden soil should be used for peas- go for a loamy soil instead. Insert poles to support the plant. Spread the seeds with 2 inches between them and then layer compost on top.
In the first 13 days, keep the plant partially shaded. Then move it into the sun. Remember to water the plant well but avoid overwatering as it causes root rot. If you plan on using a fertilizer, use one which has a low nitrogen content.
Remember to keep your peas far away from frost. Peas out!
11. Radishes
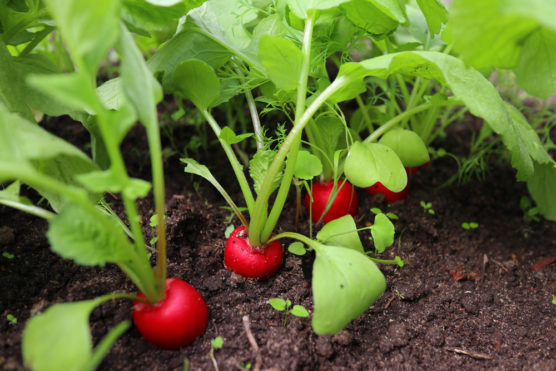
Radishes are small wonders that are rich in potassium, folate, calcium and Vitamin C. Spring and autumn are the seasons of planting.
You’ll need a container that is at least 6 inches deep and drains well. Plant the seeds with the spacing of 1 inch between them. The soil can be clayey or loamy with organic matter mixed in well. The tricky part is balancing the amount of sun and water. The radish needs 6 hours of sun at least but any harsh sun will result in damage. Ditto with water. Too less water will make the roots fibrous but too much water and you’ve got yourself root rot.
If you plan on using fertilizers, go for one with low nitrogen content. Your radishes will take 23 days to mature in the spring and around 65 days in winter. When you’re about to harvest them, pull them from the ground. A simple rule is that pull out the radishes if they’re thicker than your thumb. Throughout make sure that aphids and root maggots haven’t infested your plant.
For a beginner, the Cherry Bale is the correct variety to plant.
12. Cilantro
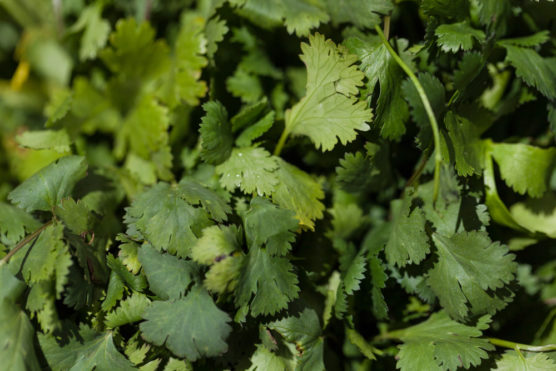
Aka coriander. The leaves, as well as the seeds, are harvested. Growing cilantro is a piece of cake because it requires no transplanting.
A moderate or cool, dry climate is suited to this plant and the seasons for leaf production are late spring and autumn. Take a deep container and plant the seeds with a seven inch spacing between them. Add well-rotted manure to the soil to keep it moist. Cilantro needs an inch of water per week. Don’t wet the leaves while watering or you’re bound to invite powdery mildew. When you use a fertilizer, make sure it is rich in nitrogen.
It’ll take approximately 3 weeks for cilantro to germinate after which you can replant it. The height of the plant should be 10 cm or more.
Harvest the leaves and the stalk (if you’re looking for seeds, the flowers will need to be dead).
For leaf harvesting, Calypso is one of the best varieties you can trust.
13. Leeks
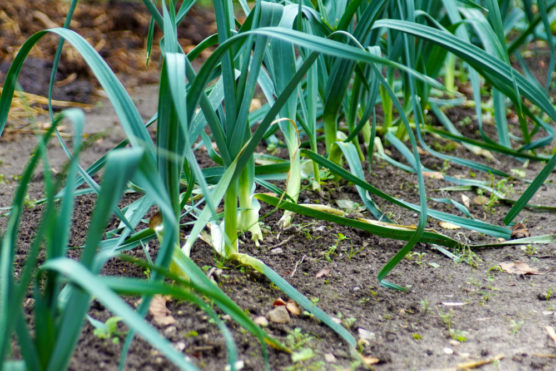
Here’s presenting the cousin of the onion! Leeks are very cooperative while you’re growing them and take 75-120 days to mature. There are two ways to go about planting leeks- with seeds or the actual veggie chopped. Take a 10-inch container and fill 2/3rd of it with soil.
The soil can be a combination of potting mix and sand to make it light and drainy. Add a healthy quantity of composted organics (like poultry manure) too. Then sprinkle the seeds or place the leeks and water. The distance between the leeks should be 6 inches at least.
Leeks need six hours of sunlight minimum. You’ll have to now follow a process called blanching. As the leeks grow, keep adding more soil as this improves the flavor.
Fall planting is desirable for them. Harvest leeks once their talks are an inch across. Some things to watch out for are slugs, leaf rot, and leek rust.
King Richard is a variety you can start with.
14. Spinach
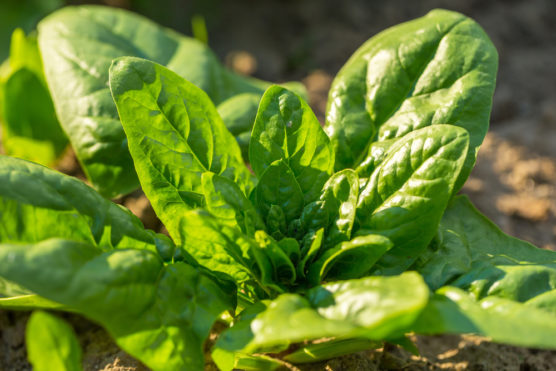
Another plant that keeps giving is spinach. Good for your eyes, heart, it also keeps cancer away. And it doesn’t require a large space to thrive.
Fill a 10-inch wide container with light crumbly soil. Add a good amount of manure to it and plant the seeds 1 inch deep and an inch apart. Spinach requires constant moisture and food. Fish emulsions or nitrogen-rich fertilizers are a great choice. But spray-on the fertilizer at the base of the plant gently or you’ll damage the shallow roots.
Since it’s a cool-season crop, spinach should be grown below 26° C. It’ll require shade in the spring and summer.
Once 5-6 leaves are fully grown, pluck them out gently from the growing point. Your plant will regrow in 4 weeks.
Melody and Baby’s Leaf Hybrid are your go-to’s.
15. Chives

Low cal but high nutrition, chives are a favorite for all the health-conscious people out there.
You need the basics for growing chives in pots- a good pot with drainage, a fine quality light potting mix, plenty of sunlight and water.
Fill the container with soil up to the brim, leaving just a little space on top. Plant seeds, water them, drain them and water them again. Use a fertilizer every 2 weeks and water immediately after. The correct temperature for chives is 15° C.
You can harvest chives once they’re 6 inches tall, 2-3 weeks later. Cut them off, leaving two inches as it is. The flowers of the chive are edible too!
16. Beets
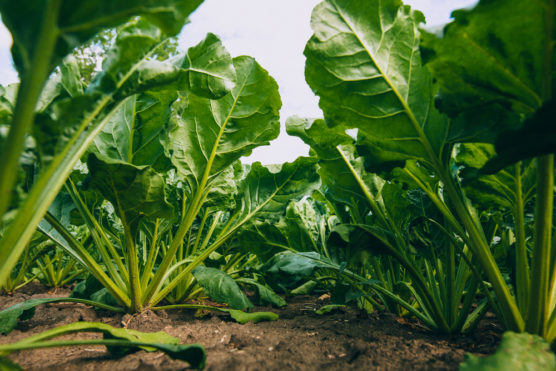
The growth rate of beets never ceases to amaze me. How can something this yum be so easy to grow? They require no transplanting, it’s all direct.
Beets are chill. I mean, they’re cool-weather crops and spring/ autumn planting is ideal. You’ll need a deep container (10 inches) and a potting soil that is highly organic and well composted. The spacing between seeds will be 2-3 inches.
You can use fertilizer once. 8 hours of sun are also essential.
Beets generally take 60 days to grow but the period varies with the variety you’ve chosen to plant. The Detroit Dark Red will take 55-65 days whereas the Bull’s Blood, 60 days.
You better get planting…
17. Okra
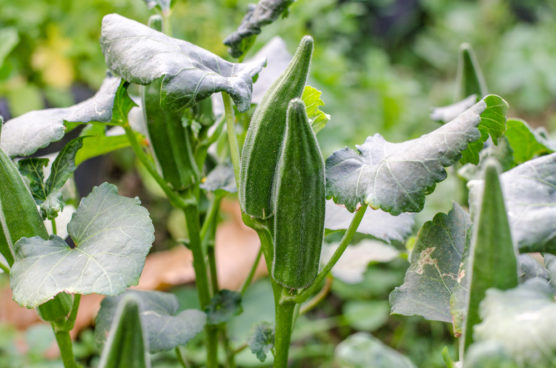
Or ladies’ finger. You can grow okra throughout the year, it doesn’t require transplanting and it’s a cut-and-come-again plant. Can I get a cheer?
You start off with a pot that is at least 10 inches deep. Okra loves the sun and a black pot absorbs heat, so kudos to you if you plant okra in a black container. Sow around 2-3 seeds (1-inch deep) in each container. The temperature to grow okra is above 13° C. It’ll need at least 6 hours of sun a day along with high-quality potting soil.
Add a good quantity of organic matter to the mix. It’ll take the plant a week or 10 days to germinate. Water it more once it starts flowering.
When you’re about to harvest the fruits, check if they’re tender.
The okra you want is the dwarf okra which grows up to 5 ft.
Oh, and did you know? Along with its Vitamin A and C, okra also helps in keeping your body in shape.
18. Potatoes
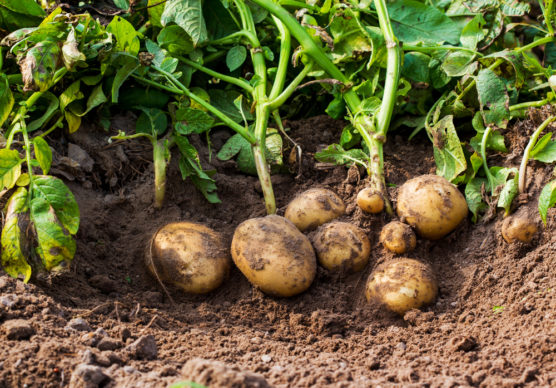
All hail the God of fast food! Let’s begin by agreeing that potatoes rock.
Let’s begin planting after frost by chopping seed potatoes in wide pots or specially made potato growing sacks. Anything which drains well is suitable. After placing the cut-up pieces, put on 3-4 inches of moist soil on top. Make sure that the soil is moist, not soggy.
Moreover, you can add time-release fertilizer to the soil along with some perlite. You should mulch the plant using wood chips or newspapers for the best results.
Potatoes need an inch of water weekly and at least 6 hours of sunlight daily. The temperature to plant should not be below 16° C.
Add more soil to the plant as the potatoes grow. You can harvest them after they start flowering. It generally takes about 10 weeks for potatoes to be ready.
19. Kohlrabi
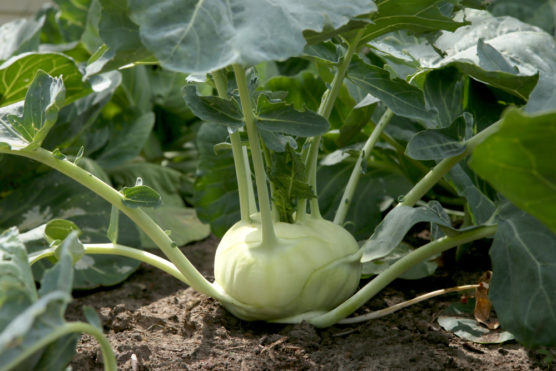
Kohl what now? If you haven’t heard about kohlrabi, you aren’t the first. Kohlrabi is a German turnip which takes around 65 days to grow. It is tolerant to cool weather but the best would be spring and fall planting.
It thrives in moist soil and 5 hours of sunlight.
You’ll need a wide container (16 inches deep and wide) to plant the seeds 10 inches apart. Research the variety you want to grow- green or purple? For instance, Korridor and Winner is a type of green kohlrabi which takes 50 days to mature. On the other hand, the Azur Star is purple. The fastest-growing type is Eder (38 days).
While harvesting, the bulb that grows above the soil is the edible part. Cut it from the base or trim its leaves. It’ll regrow and keep giving!
20. Sweet corn
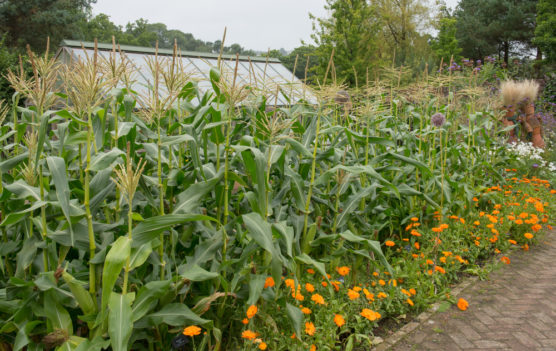
Isn’t corn just a-maize-ing?
You’re going to need a much wider pot (12 inches deep and wide) and some space for corn. I recommend you go with the dwarf variety which does not exceed 4 ft in height (Like Trinity). Plant 4 seeds per pot (1 inch into the soil) and add some more soil over them.
Your soil should have a good moisture retention capacity and it should drain well too. Your plant will need more water when it starts fruiting. Corn also needs plenty of sun to grow.
After 10 weeks, add fertilizer to the plant. Mulching will also help greatly.
Sweet corn takes 60-100 days before it is ready for harvest.
21. Zucchini
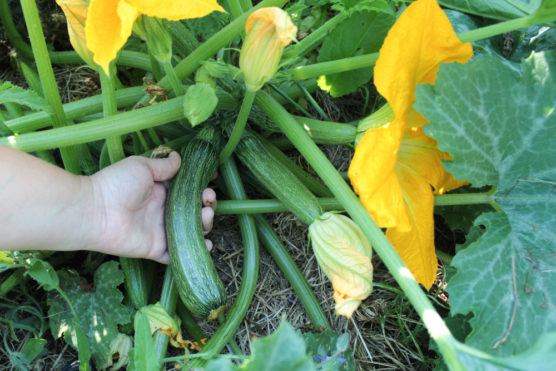
Better known as summer squash. One plant will give almost 8 pounds of zucchini after 45-60 days. Talk about being productive! The quickest varieties are Jackpot Hybrid and Raven.
Plant the seeds in April in a wide container. Your soil should be a mix of peat, moss or compost and it should drain well. Initially plant 5-6 seeds in the middle and once they’ve germinated, snip off the thinner seedlings. Fertilize weekly and water before you do. Water the plant twice a week. Zucchini also needs plenty of sun. You should check if your variety requires support (like a tomato cage).
Once the plant is six inches long, harvest it.
These should have provided you enough information, so you better start eating healthy. Remember the basics:
1 Choose the correct container.
2 Get the right soil.
3 Watch the sunlight required for the plant.
4 Water the plant regularly.
5 Keep an eye out for infections
6 Be patient.
All set? Go plant!